Introduction to Home Can Chicken Soup Recipe
Nothing beats the comfort of homemade Can Chicken Soup Recipe on a cold day. Imagine having that same nourishing meal ready in minutes, straight from your pantry shelf.
Canning chicken soup lets you preserve dozens of servings at once. You’ll save time on busy weeknights. You’ll cut grocery costs. Most importantly, you’ll know exactly what goes into every jar.
This isn’t just about convenience. Home-canned soup tastes better than store-bought versions. No preservatives. No artificial flavors. Just pure, wholesome ingredients you control.
The process is simpler than you think. With the right equipment and technique, you can safely preserve gallons of soup. One weekend of prep gives you months of ready-to-eat meals.
Safety comes first in canning. This guide covers every critical step. Follow these instructions exactly, and you’ll create shelf-stable soup that’s both delicious and safe to eat.
Essential Equipment and Supplies
Pressure Canner
A pressure canner is non-negotiable for chicken soup. Water bath canning won’t work for low-acid foods like meat and vegetables. You need temperatures above 240°F to kill harmful bacteria.
Choose a weighted-gauge or dial-gauge pressure canner. Weighted-gauge models are more reliable for beginners. They maintain consistent pressure automatically. Dial-gauge canners require annual testing for accuracy.
Canning Jars and Lids
Use only proper canning jars. Mason jars work perfectly. Never reuse commercial food jars like pickle or jam containers. They can’t handle canning pressure.
Buy new lids for each batch. The rubber sealing compound only works once. You can reuse metal rings if they’re not bent or rusty.
Pint jars work best for chicken soup. They process faster than quarts. Most families consume a pint-sized serving in one meal.
Essential Tools
A jar lifter prevents burns when handling hot jars. Rubber-coated tongs work in a pinch but aren’t as safe.
A canning funnel keeps jar rims clean. Dirty rims prevent proper sealing. Wide-mouth funnels fit standard canning jars perfectly.
Keep a bubble removal tool handy. Air bubbles affect processing times. A plastic knife or chopstick works if you don’t have the official tool.
Safety Equipment
Wear safety glasses when pressure canning. Steam releases can cause eye injuries. Heat-resistant gloves protect your hands from hot jars and steam.
Keep a timer nearby. Exact processing times matter for food safety. Under-processing creates dangerous conditions for botulism growth.
Nice-to-Have Additions
A magnetic lid lifter saves time fishing lids from hot water. A headspace gauge ensures proper fill levels. These tools speed up the process but aren’t absolutely necessary.
Core Ingredients and Preparation
Chicken Selection
Use fresh or thawed chicken for best results. Bone-in pieces create richer flavor than boneless cuts. Thighs and drumsticks work perfectly. They stay tender during the canning process.
Plan on 2-3 pounds of chicken for 7 pint jars. This includes bones and skin. You’ll remove bones before jarring, so account for waste.
Avoid pre-cooked rotisserie chicken. The meat becomes mushy during pressure processing. Fresh chicken holds its texture better.
Essential Vegetables
Carrots add sweetness and color. Cut them into uniform 1/2-inch pieces. Larger chunks may not heat through properly during processing.
Celery provides classic soup flavor. Remove tough strings before chopping. Dice into similar-sized pieces as carrots.
Onions create the flavor base. Yellow onions work best for soup. Dice them medium-fine so they distribute evenly throughout jars.
Safe Ingredients Only
Stick to tested ingredients for safety. Never add dairy products, flour, or thickeners. These can interfere with heat penetration during processing.
Avoid pasta, rice, or potatoes in canned soup. They become mushy and affect texture. Add these fresh when serving.
Fresh herbs lose flavor during canning. Use dried herbs instead. They maintain their taste through the high-heat process.
Preparation Steps
Wash all vegetables thoroughly. Remove any blemished spots. Pat chicken dry with paper towels before cooking.
Cut vegetables uniformly. Even sizes ensure consistent cooking. Prep everything before you start cooking. The process moves quickly once you begin.
Season lightly during preparation. You can always add more salt and spices when serving. Over-seasoning becomes concentrated during canning.
Ingredient Ratios
Balance is key for good soup. Use roughly equal amounts of chicken meat and vegetables by volume. Too much liquid creates weak flavor. Too little liquid prevents proper heat circulation.
Plan for 1 cup of prepared vegetables per pint jar. Add 3-4 ounces of cooked chicken meat per jar. Fill remaining space with hot broth.
Ingredient Substitutions and Variations
Chicken Alternatives
Turkey works perfectly in place of chicken. Use the same ratios and processing times. Dark meat turkey stays moister than white meat during canning.
Duck creates rich, flavorful soup. Remove excess fat during cooking. Too much fat can interfere with jar sealing.
Avoid fish or seafood substitutions. These require different processing methods not covered in this recipe.
Vegetable Swaps
Green beans replace carrots beautifully. Trim ends and cut into 1-inch pieces. They hold their texture well during pressure canning.
Corn adds sweetness and color. Use fresh or frozen kernels. Avoid creamed corn or corn with added ingredients.
Bell peppers work in small amounts. They can overpower the soup’s flavor. Use no more than one pepper per batch.
Mushrooms add earthy flavor. Choose firm varieties like button or cremini. Slice them thick to prevent mushiness.
Safe Seasoning Options
Bay leaves enhance flavor without adding sodium. Remove them before jarring or warn family members about whole leaves in soup.
Black peppercorns work better than ground pepper. They won’t create sediment in your finished soup.
Garlic powder replaces fresh garlic. Fresh cloves can become bitter during long processing times.
Dried thyme, oregano, and sage all survive canning well. Start with small amounts. You can always add more when serving.
What to Avoid
Never substitute low-sodium ingredients during canning. Salt helps preserve food and affects processing safety. Add low-sodium alternatives when reheating.
Skip fresh herbs like parsley or cilantro. They turn brown and lose flavor. Stir them into individual servings instead.
Avoid exotic vegetables you haven’t canned before. Stick to tested ingredients for your first batches.
Quantity Adjustments
Scale recipes up or down easily. Maintain the same ratios of meat to vegetables to broth. Double or triple ingredients for larger batches.
One batch typically makes 7 pint jars. Half the recipe yields 3-4 jars. Make sure you have enough soup to fill your canner efficiently.
Dietary Modifications
Create lower-sodium versions by reducing salt during preparation. Add salt to taste when serving individual portions.
Make the soup heartier by increasing chicken quantities. Use up to 4 pounds of chicken for the same vegetable amounts.
Create a lighter version with more vegetables and less chicken. Maintain proper liquid ratios for safe processing.
Making the Base Chicken Stock
Starting the Stock
Place chicken pieces in a large stockpot. Cover completely with cold water. Use about 12 cups of water for 2-3 pounds of chicken.
Add basic aromatics now. One quartered onion, two celery stalks, and two carrots enhance flavor. Don’t worry about perfect cuts. You’ll strain these out later.
Bring water to a gentle boil over medium-high heat. Reduce heat immediately when bubbles appear. Rapid boiling creates cloudy, greasy stock.
Skimming for Clarity
Gray foam will rise to the surface within 10 minutes. Skim it off with a ladle or large spoon. This foam contains impurities that cloud your finished stock.
Continue skimming every 15 minutes for the first hour. Less foam appears as cooking progresses. Clear stock looks more appealing in jars.
Simmering Process
Maintain a bare simmer for 1.5 to 2 hours. Tiny bubbles should barely break the surface. High heat toughens the meat and creates greasy stock.
Don’t cover the pot completely. Partial covering prevents over-concentration while allowing evaporation. This creates richer flavor.
Test chicken doneness by checking if meat pulls easily from bones. Overcooked chicken becomes stringy in the final soup.
Straining and Separating
Remove chicken pieces first. Set them aside to cool. They’ll be too hot to handle immediately.
Strain the stock through a fine mesh strainer. Press vegetables gently to extract maximum flavor. Discard the spent vegetables.
Let chicken cool until you can handle it safely. Remove all skin and bones. Shred meat into bite-sized pieces. Save the meat for your soup.
Defatting the Stock
Refrigerate strained stock for 2-3 hours. Fat will solidify on the surface as white layer. Remove this fat with a spoon.
For immediate use, skim surface fat with a ladle. Work quickly while stock stays hot. Some fat will remain, but most should come off.
Ice cubes dropped briefly into stock attract fat. Remove cubes quickly before they melt. This method works for emergency defatting.
Stock Quality Check
Good stock should taste rich but not salty. It may gel slightly when cold due to natural gelatin from bones. This indicates high-quality stock.
The color should be golden yellow, not gray or cloudy. Clear stock creates more attractive finished soup. Taste for balanced flavor before proceeding.
Measure your finished stock. You need about 6-7 cups for a standard batch of canned soup. Make additional stock if needed.
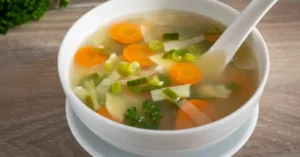
Preparing the Complete Soup
Combining Core Ingredients
Heat your prepared chicken stock in a large, heavy-bottomed pot. Bring it to a rolling boil over medium-high heat. Hot stock ensures even cooking of vegetables.
Add diced carrots first. They take longest to cook among the vegetables. Simmer for 5 minutes before adding other ingredients.
Stir in celery and onions next. These cook faster than carrots but need time to soften. Continue simmering for another 3-4 minutes.
Add your shredded chicken meat last. It’s already cooked and just needs to heat through. Too much cooking makes chicken stringy and tough.
Seasoning the Soup
Salt the soup carefully. Use about 1 teaspoon per quart of soup as a starting point. You can adjust individual servings later if needed.
Add dried herbs now. Bay leaves, thyme, and oregano work beautifully. Start with 1/2 teaspoon of each per batch. Taste and adjust.
Black pepper should be freshly ground if possible. White pepper works too but has a different flavor profile. Add gradually and taste frequently.
Achieving Proper Consistency
The soup should be brothy, not thick. Thick soups don’t heat evenly during pressure canning. This creates food safety risks.
Vegetables should be tender but still hold their shape. Mushy vegetables indicate overcooking. They’ll break down more during the canning process.
Maintain enough liquid to cover all solid ingredients. Add more hot stock if needed. Proper liquid levels ensure safe heat penetration.
Final Cooking Steps
Simmer the complete soup for 10-15 minutes total. This melds flavors without overcooking ingredients. Taste and adjust seasoning one final time.
Remove any bay leaves before jarring. Whole leaves can be sharp and unpleasant in individual servings. Mark this step on your recipe notes.
Keep the soup hot while filling jars. Cold soup takes longer to process safely. It also affects jar seal quality.
Quality Assessment
Your finished soup should smell rich and savory. The broth should be clear, not cloudy. Vegetables should be uniformly tender.
Chicken pieces should be bite-sized and evenly distributed. Large chunks don’t heat through properly during canning. Break them down if needed.
Taste the final product. It should be well-seasoned but not overpowering. Remember that flavors concentrate slightly during canning.
Timing Coordination
Start heating your pressure canner while finishing the soup. This saves time and keeps everything hot. Timing matters for successful canning.
Have your clean jars warming in hot water. Cold jars can crack when filled with hot soup. Proper temperature control prevents problems.
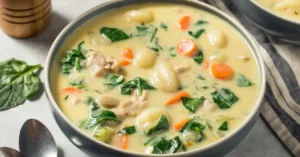
Pressure Canning Process
Preparing Your Pressure Canner
Fill your pressure canner with 2-3 inches of water. Check your manual for exact amounts. Too little water creates insufficient steam. Too much water may contact jar bottoms.
Place the canner rack inside. This prevents jars from sitting directly on the bottom. Direct contact can cause jar breakage from intense heat.
Start heating the canner on medium-high heat while you fill jars. Getting a head start saves time. The water should be simmering when jars go in.
Filling the Jars
Use a canning funnel to prevent spills. Keep jar rims clean for proper sealing. Wipe any soup residue with a damp cloth before applying lids.
Leave 1-inch headspace in each jar. This space allows for expansion during processing. Too little space prevents proper sealing. Too much affects heat penetration.
Distribute ingredients evenly between jars. Each jar should have similar amounts of chicken, vegetables, and broth. Consistent filling ensures uniform processing.
Remove air bubbles with a plastic knife or bubble tool. Insert the tool along jar sides and gently stir. Air pockets interfere with heat distribution.
Applying Lids and Rings
Wipe jar rims again after removing bubbles. Even tiny food particles prevent proper sealing. Clean rims are crucial for success.
Place new lids on each jar. Don’t reuse old lids – the sealing compound only works once. Center lids carefully over jar openings.
Screw on metal rings finger-tight only. Over-tightening prevents air from escaping during processing. This creates seal failures.
Loading the Canner
Use jar lifters to place filled jars in the canner. Keep jars upright and don’t let them touch each other. Steam must circulate freely around each jar.
Add hot water if needed. Water should cover jar bottoms by 1-2 inches. Don’t pour water directly onto jars – this can cause temperature shock.
Processing Steps
Put the canner lid on securely. Don’t add the pressure regulator weight yet. Allow steam to vent freely for 10 minutes first.
Watch for steady steam flow from the vent. This purges air from the canner. Proper venting is essential for accurate pressure readings.
Add the pressure weight or close the petcock after venting. Pressure should build gradually. Never try to speed up this process with higher heat.
Maintaining Pressure
Process pint jars at 11 pounds pressure for 75 minutes. Quart jars need 90 minutes. Adjust pressure for altitude if you live above 1,000 feet.
Monitor pressure throughout processing. Adjust heat to maintain steady pressure. Fluctuating pressure affects safety and seal quality.
Start timing when proper pressure is reached. Don’t count venting time. The full processing period ensures food safety.
Cooling Process
Turn off heat when processing time ends. Let pressure drop naturally. Never remove weights or open vents to speed cooling.
Wait until pressure gauge reads zero or weights stop jiggling. This takes 30-60 minutes depending on your canner size.
Remove the weight or open the petcock carefully. Stand back to avoid steam burns. Wait 10 more minutes before opening the canner lid.
Removing Jars
Lift the canner lid away from yourself. Steam can cause serious burns. Use jar lifters to remove jars carefully.
Place jars on towels away from drafts. Don’t tighten rings or check seals yet. Let jars cool undisturbed for 12-24 hours.
Listen for the “pop” of sealing lids. This musical sound means your jars are sealing properly. Most jars seal within the first few hours.
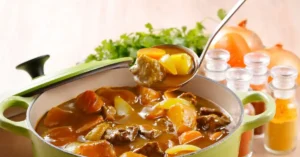
Safety Guidelines and Best Practices
Testing Jar Seals
Wait 12-24 hours before testing seals. Press the center of each lid firmly. Properly sealed lids won’t move or make clicking sounds.
Remove metal rings after cooling. Check that lids stay firmly attached without rings. Rings can hide seal failures if left on during storage.
Lift each jar by its lid edges only. Sealed jars should support their full weight. If a lid comes off, the jar didn’t seal properly.
Altitude Adjustments
Increase pressure for higher altitudes. Add 1 pound pressure for every 2,000 feet above sea level. This compensates for lower atmospheric pressure.
Processing times remain the same regardless of altitude. Only pressure changes with elevation. Check your local altitude if you’re unsure.
Use a dial-gauge canner at high altitudes when possible. They provide more precise pressure control than weighted-gauge models.
Critical Temperature Rules
Never process chicken soup in a water bath canner. Water boiling reaches only 212°F. Chicken soup requires 240°F minimum to kill dangerous bacteria.
Process at full pressure for the entire time period. Partial processing creates perfect conditions for botulism growth. This can be deadly.
Don’t interrupt processing once it starts. Power outages or equipment failures mean starting completely over with fresh soup.
Handling Seal Failures
Refrigerate unsealed jars immediately. Use them within 3-4 days like fresh soup. Don’t try to reprocess day-old soup.
You can reprocess failed jars within 24 hours using fresh lids. Heat the soup to boiling first. Treat it like a completely new batch.
Never taste soup from bulging or leaking jars. Dispose of these jars without opening them. Even tiny amounts of botulism toxin can kill.
Storage Safety Rules
Store sealed jars in a cool, dark place. Basements and pantries work perfectly. Avoid areas with temperature fluctuations.
Remove rings before storage. They can rust and hide developing problems. Clean rings can be reused for future canning projects.
Label jars with contents and date. Use within 2-3 years for best quality. Older jars may be safe but lose nutritional value and taste.
Warning Signs to Avoid
Never eat soup from jars with bulging lids. This indicates bacterial growth and gas production. The contents are extremely dangerous.
Reject jars with broken seals, even if they look fine inside. Once contaminated, soup can harbor deadly bacteria without obvious signs.
Avoid jars with unusual odors when opened. Good canned soup smells fresh and appetizing. Off odors mean spoilage.
Look for color changes or mold growth. These indicate contamination. Don’t try to remove bad portions – discard the entire jar.
Emergency Procedures
If you suspect botulism poisoning, seek medical help immediately. Symptoms include difficulty swallowing, speaking, or breathing.
Contact your local health department about suspected food poisoning cases. They track outbreaks and can provide guidance.
Keep detailed records of processing times and pressures. This information helps identify problems if illness occurs.
Equipment Maintenance
Test dial-gauge canners annually for accuracy. Contact your county extension office for testing locations. Inaccurate gauges create safety risks.
Replace rubber gaskets when they become cracked or stiff. Damaged gaskets prevent proper pressure buildup during processing.
Clean canner thoroughly after each use. Remove food residues that can harbor bacteria. Store in a clean, dry location.

Troubleshooting Common Issues
Seal Failures and Solutions
Jars that don’t seal usually have dirty rims. Food particles or grease prevent proper lid contact. Always wipe rims thoroughly before applying lids.
Over-tightened rings cause seal failures too. Tighten rings finger-tight only. Air needs to escape during processing for vacuum seals to form.
Old or damaged lids won’t seal reliably. Use only new lids from reputable manufacturers. Check expiration dates on lid packages.
Rapid temperature changes crack jars and prevent sealing. Keep soup hot during filling. Warm jars before adding hot contents.
Liquid Loss During Processing
Some liquid loss is normal during pressure canning. Don’t open jars to add liquid. This breaks the sterile seal you just created.
Excessive liquid loss indicates overfilled jars. Leave proper headspace next time. Overpacking forces liquid out during processing.
Fluctuating pressure causes liquid siphoning. Maintain steady pressure throughout processing. Adjust heat gradually, never dramatically.
Food particles on jar rims can channel liquid out. Clean rims more carefully. Even tiny bits of food create pathways for liquid escape.
Cloudy Broth Problems
Cloudy broth usually comes from rapid boiling during stock preparation. Maintain gentle simmers for clear results.
Starchy vegetables like potatoes cloud broth. Stick to recommended vegetables for clear soup. Save potatoes for fresh additions.
Old or poor-quality chicken creates cloudy stock. Use fresh chicken from reliable sources. Remove skin and excess fat before cooking.
Color and Texture Issues
Gray or brown chicken meat indicates overcooking. Reduce cooking time during soup preparation. Chicken continues cooking during canning.
Mushy vegetables result from overcooking or using overripe produce. Cut vegetables uniformly. Choose firm, fresh vegetables for best texture.
Separated broth suggests too much fat remained in stock. Skim fat more thoroughly during stock preparation. Cool stock to solidify fat for easier removal.
Processing Problems
Pressure that won’t build indicates gasket problems. Check rubber seals for cracks or food particles. Replace damaged gaskets before processing.
Steam leaking around the lid means improper closure. Ensure lid locks securely. Clean gasket surfaces before each use.
Pressure dropping during processing suggests vent problems. Don’t lift weights or open vents during processing. This ruins the entire batch.
Jar and Equipment Issues
Cracked jars during processing indicate thermal shock. Warm jars in hot water before filling. Avoid extreme temperature changes.
Stuck lids after cooling usually mean proper sealing. Use a bottle opener to pry up lid edges carefully. Don’t force stuck lids.
Rusty rings indicate moisture exposure. Store rings in dry locations. Replace rusty rings – they can contaminate food.
Quality Control Solutions
Floating fat in finished soup means inadequate skimming. Chill stock longer next time. Remove all visible fat before final cooking.
Bland flavor suggests under-seasoning. Season more boldly during preparation. Flavors concentrate slightly during canning.
Uneven ingredient distribution happens with improper filling technique. Ladle soup carefully to distribute contents evenly between jars.
Preventive Measures
Test equipment before each canning session. Check gaskets, pressure gauges, and vent systems. Address problems before starting.
Keep detailed processing logs. Record times, pressures, and any problems. This helps identify patterns in recurring issues.
Practice with small batches first. Learn your equipment’s quirks with less food at risk. Build confidence before making large batches.
Start processing early in the day. This allows time to troubleshoot problems without rushing. Proper canning can’t be hurried safely.
Storage and Serving Suggestions
Proper Storage Methods
Store sealed jars in a cool, dark location between 50-70°F. Basements, pantries, and interior closets work perfectly. Avoid garages or attics with temperature swings.
Keep jars upright on sturdy shelves. Don’t stack them more than two high. Weight can crack lower jars and compromise seals.
Protect jars from direct sunlight. Light degrades nutrients and affects color. Dark storage areas maintain better quality longer.
Check stored jars monthly for problems. Look for broken seals, bulging lids, or leakage. Remove damaged jars immediately.
Shelf Life Guidelines
Use canned chicken soup within 2-3 years for peak quality. Properly processed soup remains safe much longer but loses nutritional value and taste.
Label jars clearly with contents and processing date. Rotate stock using oldest jars first. This prevents waste from forgotten jars.
Track inventory with a simple list. Note when you use jars and when you add new ones. This helps plan future canning sessions.
Opening and Serving
Remove metal lids carefully with a can opener or bottle opener. Sealed lids create strong vacuum suction. Pry up edges gradually.
Check contents before serving. Good soup should smell fresh and appetizing. Reject jars with off odors, unusual colors, or mold.
Heat soup thoroughly before serving. Bring to a rolling boil for food safety. This kills any bacteria that might have developed.
Never taste cold soup directly from jars. Always heat first, even if it looks and smells normal. This simple step prevents foodborne illness.
Enhancement Ideas
Add fresh ingredients when reheating for improved texture and flavor. Cooked pasta, rice, or potatoes work beautifully.
Stir in fresh herbs during the last few minutes of heating. Parsley, dill, or chives brighten the finished soup considerably.
Adjust seasoning after heating. Canned soup may need additional salt, pepper, or herbs to suit individual tastes.
Create cream-based versions by adding milk or cream during reheating. Start with small amounts to avoid curdling from high heat.
Portion Planning
One pint jar typically serves 2 people as a light meal or 4 people as a starter. Plan accordingly when opening jars.
Divide large jars into smaller portions after opening. Refrigerate unused portions and consume within 3-4 days.
Freeze leftover heated soup for up to 3 months. Use freezer-safe containers and leave expansion room. Thaw completely before reheating.
Gift and Sharing Ideas
Home-canned soup makes thoughtful gifts for new parents, elderly neighbors, or busy families. Include reheating instructions with gift jars.
Create gift baskets with several soup flavors. Add crusty bread, crackers, or homemade rolls for complete meals.
Teach friends and family your canning techniques. Share the knowledge and create a community of home canners.
Emergency Preparedness
Canned soup provides reliable nutrition during power outages or emergencies. No refrigeration required until opened.
Keep a manual can opener with your emergency supplies. Electric openers won’t work during power failures.
Stock extra jars during harvest season when ingredients are abundant and affordable. This creates year-round food security.
Recipe Expansion
Use your canned soup as a base for other dishes. Add dumplings, noodles, or vegetables for variety.
Create casseroles using soup as a sauce ingredient. Mix with cooked rice or pasta for complete one-dish meals.
Experiment with international flavors when serving. Add curry powder, Italian herbs, or Mexican spices for global variations.
Storage and Serving Suggestions
Store sealed jars in a cool, dark location between 50-70°F. Basements, pantries, and interior closets work perfectly. Avoid garages or attics with temperature swings.
Keep jars upright on sturdy shelves. Don’t stack them more than two high. Weight can crack lower jars and compromise seals.
Protect jars from direct sunlight. Light degrades nutrients and affects color. Dark storage areas maintain better quality longer.
Check stored jars monthly for problems. Look for broken seals, bulging lids, or leakage. Remove damaged jars immediately.
Shelf Life Guidelines
Use canned chicken soup within 2-3 years for peak quality. Properly processed soup remains safe much longer but loses nutritional value and taste.
Label jars clearly with contents and processing date. Rotate stock using oldest jars first. This prevents waste from forgotten jars.
Track inventory with a simple list. Note when you use jars and when you add new ones. This helps plan future canning sessions.
Opening and Serving
Remove metal lids carefully with a can opener or bottle opener. Sealed lids create strong vacuum suction. Pry up edges gradually.
Check contents before serving. Good soup should smell fresh and appetizing. Reject jars with off odors, unusual colors, or mold.
Heat soup thoroughly before serving. Bring to a rolling boil for food safety. This kills any bacteria that might have developed.
Never taste cold soup directly from jars. Always heat first, even if it looks and smells normal. This simple step prevents foodborne illness.
Enhancement Ideas
Add fresh ingredients when reheating for improved texture and flavor. Cooked pasta, rice, or potatoes work beautifully.
Stir in fresh herbs during the last few minutes of heating. Parsley, dill, or chives brighten the finished soup considerably.
Adjust seasoning after heating. Canned soup may need additional salt, pepper, or herbs to suit individual tastes.
Create cream-based versions by adding milk or cream during reheating. Start with small amounts to avoid curdling from high heat.
Portion Planning
One pint jar typically serves 2 people as a light meal or 4 people as a starter. Plan accordingly when opening jars.
Divide large jars into smaller portions after opening. Refrigerate unused portions and consume within 3-4 days.
Freeze leftover heated soup for up to 3 months. Use freezer-safe containers and leave expansion room. Thaw completely before reheating.
Gift and Sharing Ideas
Home-canned soup makes thoughtful gifts for new parents, elderly neighbors, or busy families. Include reheating instructions with gift jars.
Create gift baskets with several soup flavors. Add crusty bread, crackers, or homemade rolls for complete meals.
Teach friends and family your canning techniques. Share the knowledge and create a community of home canners.
Emergency Preparedness
Canned soup provides reliable nutrition during power outages or emergencies. No refrigeration required until opened.
Keep a manual can opener with your emergency supplies. Electric openers won’t work during power failures.
Stock extra jars during harvest season when ingredients are abundant and affordable. This creates year-round food security.
Recipe Expansion
Use your canned soup as a base for other dishes. Add dumplings, noodles, or vegetables for variety.
Create casseroles using soup as a sauce ingredient. Mix with cooked rice or pasta for complete one-dish meals.
Experiment with international flavors when serving. Add curry powder, Italian herbs, or Mexican spices for global variations.
Document successful modifications in a recipe journal. Build a collection of family-favorite variations over time.
Conclusion
Home canning chicken soup transforms simple ingredients into shelf-stable comfort food that’s ready whenever you need it. This traditional preservation method saves money, reduces food waste, and gives you complete control over ingredients and quality. With proper equipment, tested recipes, and careful attention to safety guidelines, you can create dozens of jars of nourishing soup from a single cooking session. The skills you develop will serve you for years, providing food security and the satisfaction of self-sufficiency. Start with small batches to build confidence, then expand your canning efforts as you master the techniques. Your future self will thank you when a warm, homemade meal is just minutes away from your pantry shelf.
FAQS
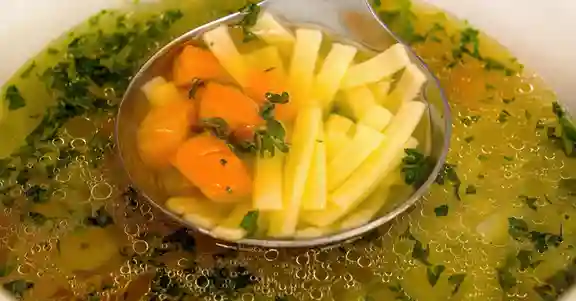
Can Chicken Soup Recipe
Ingredients
Method
- Place the whole chicken in a large pot and cover with 12 cups of water
- Add bay leaves, one diced onion, sliced carrots, chopped celery, and garlic
- Bring to a boil, then reduce heat and simmer for 1-1.5 hours until chicken is tender
- Remove chicken from pot and let cool, then shred the meat and discard bones and skin
- Strain the broth through a fine mesh strainer and return to pot
- Heat olive oil in the same pot over medium heat
- Sauté the remaining diced onion, carrots, and celery for 5-7 minutes until softened
- Pour the strained chicken broth back into the pot
- Add thyme, parsley, salt, and pepper
- Bring to a boil, then add egg noodles or rice
- Cook for 8-10 minutes until noodles are tender
- Return the shredded chicken to the pot
- Simmer for 5 more minutes to heat through
- Taste and adjust seasoning with salt, pepper, and a splash of lemon juice if desired
- Remove bay leaves before serving
- Garnish with fresh chopped parsley
- Serve hot in bowls
- Can be stored in refrigerator for 3-4 days
- Freezes well for up to 3 months (freeze without noodles for best results)
